Django Ecommerce Website Tutorial Part One

After getting a lot of request of Django Ecommerce website from previous posts that we have on our website. Now we are going to start new series of posts about Ecommerce Website with Django.
To Learn Django, the best way is to making some real world projects with Django. We always focus on making real world example project to help you learn Django.
After this series of posts, the next project will be School Management Project with Django. we are going to implement Django Channels in the School Management Website to have live user to user chat functionality.
If you wants to learn Django and follow us through the series. You can join our community by click the bell icon on the left side of the bottom of the screen.
By making an eCommerce website with Django will help you to understand a lots of inbuilt methods in Django. We can write the whole process in one post but it will be a long post to go through top to bottom. So it’s better to go through step by step.
What you will going to learn in this tutorial
- 1. Designing Product Model
- 2. User Authentication with Django Allauth
- 3. Using ready made HTML Ecommerce Template
- 4. Showing the Products with category
- 5. Adding Products to Cart
- 6. Removing Products from the Cart
- 7. Showing Products which are in the user’s Cart
If you are new to Django and you are reading this tutorial first time. Then we would recommend you to go through the previous tutorials to have some basic knowledge about Django.
Other Related Tutorials:
- Adding search filters in Django eCommerce website
- Real world SAAS application in Django tutorial
- Build a SaaS Application in Django 3.0| SaaS Series
- Stripe Payment Gateway Integration in Django eCommerce Website
- Django eCommerce tutorial part two
Requirements
Before you proceed to the tutorial, you must have basic knowledge about Django. Either you can follow the Djago Tutorial on Django’s offical documentation or you can follow our previous tutorial. If you have the basic knowledge then you should have these requirements.
- Python 3.6 or above
- Django 2.0 or above
- You favorite code editor ( We prefer VS CODE )
- Basic knowledge about HTML5 and CSS3 or any CSS framework ( ie. Bootstrap )
- Internet Connect 📶
Once you have all these requirements installed in your system. Now we can go though step by step to get our Ecommerce website done.
1.Start the Project
First of all we have to create the project directory in our system. Create a folder ( we are naming the folder as ecommerce ) and open the command prompt in the directory. Activate the virtual environment (we are going to use pipenv ) and install Django. Now as you know type the command to create a Django Project.
Create project Command:
django-admin startproject ecommerce2.Create the app
After creating the project now we need to have an app for our products. So again use <strong>python manage.py startapp products</strong> the command to create the app. We are not focusing on the basic stuff. We know you knew that already just create the app and install the app in the settings.py file of the project.
3.Create Product Model
For now we creating the product model with as much as simple we can. As we go though this tutorial we are going to add more fields into the model. For now we are going to have category and products in one model but in future we will separate them. So we can have multiple category and other functionality.
Now we are going to have these fields in our product model
- Title – CharField
- Category – Charfield ( foreignkey )
- preview text – TextField
- Description – TextField
- Price – FloatField
- Timestamp – DateTimeField
- Thumbnail – ImageField ( For Images we need to have Pillow Library installed in our env )
The code will look like this. You can copy and paste but better will be if you write the model by yourself.
In case of Category we have foreign key field. So we need to create the Category Model first, you can create after the product model.
Category Model :
class Category(models.Model):
    title = models.CharField(max_length=300)
    primaryCategory = models.BooleanField(default=False)

    def __str__(self):
        return self.title
For now, we have a field called primary category because we may not to need to show all the category on the web page at once. Don’t worry about that we will modify the category model later.
#Product Model
class  Product(models.Model):
    mainimage = models.ImageField(upload_to='products/', blank=True)
    name = models.CharField(max_length=300)
    slug = models.SlugField()
    category = models.ForeignKey(Category, on_delete=models.CASCADE)
    preview_text = models.TextField(max_length=200, verbose_name='Preview Text')
    detail_text = models.TextField(max_length=1000, verbose_name='Detail Text')
    price = models.FloatField()


    def __str__(self):
        return self.name
4. Install Pillow
In our product model we are using image field so have to use Python’s image library called Pillow. Just type pip install Pillow or pipenv install Pillow if you are using pipenv. Sometimes you may face some issue when you are installing Pillow on your system. For the problem follow the docs or search the problem on google to solve that issue.
5. Adding Products and Showing the Products on the website
Now it is time to add some dummy products to check the work that we did in the previous steps. So first of the we have created a some models so we need to migrate the models first. You know all the commands for migrating the models but for those who don’t know use these commands to migrate.
python manage.py makemigrations
python manage.py migrate
After all that now, create the super user if you have not. After did all that run the server and go to the admin dashboard but we are not seeing any products models in the dashboard. So have not registered the models to the admin dashboard. Open the admin.py file and register those models to add some items to database.
To register those models in Admin Dashboard :
from django.contrib import admin

from products.models import Category, Product

admin.site.register(Category)
admin.site.register(Product)
Now all the models will show up in the dashboard and add some dummy products for testing. After adding some products now let’s go to the next for creating views.
6. Create view for showing the products
Open the views.py file to create the home page view as usual. Now in the tutorial we are going to use Class Based View most of the times. So we are creating a view called home and on the home page we have list of products to show so we are going to use ListView.
So first import import the ListViewfrom django.views.generic then write the code for the home view.
Home view :
from django.views.generic import ListView
from products.models import Product

class Home(ListView):
    model = Product
    template_name = 'products/home.html'
7. Create the Home Page HTML template
For creating the home page template we need to create the directory first, so create a new folder called templates in the products app directory . And then create another folder inside the templatesdirectory called same name of your app name. In case, our app name is products. If you don’t know about Django Template, then you can visit the official docs for more information > Django Template
Now inside the products folder create a HTML5 boilerplate and name it as home.html as we defined in the home view. For using some pre-made design we are going to use Bootstrap 4 cdn.
Here is the home.html template code :
{% load static %}

<html lang="en">
<head>
  <meta charset="UTF-8">
  <meta name="viewport" content="width=device-width, initial-scale=1.0">
  <meta http-equiv="X-UA-Compatible" content="ie=edge">
  <link rel="stylesheet" href="https://stackpath.bootstrapcdn.com/bootstrap/4.3.1/css/bootstrap.min.css" integrity="sha384-ggOyR0iXCbMQv3Xipma34MD+dH/1fQ784/j6cY/iJTQUOhcWr7x9JvoRxT2MZw1T" crossorigin="anonymous">
  <title>Djago Ecommer | manascode.com</title>
</head>
<body>
  <div class="container">
    <div class="row">
      {% for product in object_list %}
      <div class="col-md-4 col-sm-12 col-lg-3 m-1">
              <div class="card" style='width:100%; height:300px;'>
                <img src="media/{{ product.mainimage }}" style="width:100%;" class="card-img-top" alt="{{ product.name }}">
                      <div class="card-body">
                        <h5 class="card-title"> {{ product.name }}</h5>
                        <p class="card-text">{{ product.preview_text }}</p>
                      </div>
                  <div class='card-footer text-center'>
                  <a href="#" class="btn btn-success">Add to Cart</a>
                  </div>
               </div>
        </div>
      {% endfor %}
  </div>
  </div>
</body>
</html>
In the home.html template, you can notice that we are using object_list instead of using products. because we are using Class Based View and by default ListView provide the context as object_list. For more information read the documentation or you can visit this website > http://bit.ly/ListView
Create a new url for the home view :
Create a new file called urls.py in the Products app and then first import path and then import the view we created for the home page.
The code will be like this :
from django.urls import path
from . views import Home
app_name= 'mainapp'

urlpatterns = [
    path('', Home.as_view(), name='home'),
]
Now we need to map the url in our project’s urlpatterns. So open the urls.py file in the projects directory and then import the include method.
from django.urls import path, include
urlpatterns = [
path('', include('products.urls', namespace='mainapp')),
path('admin/', admin.site.urls),
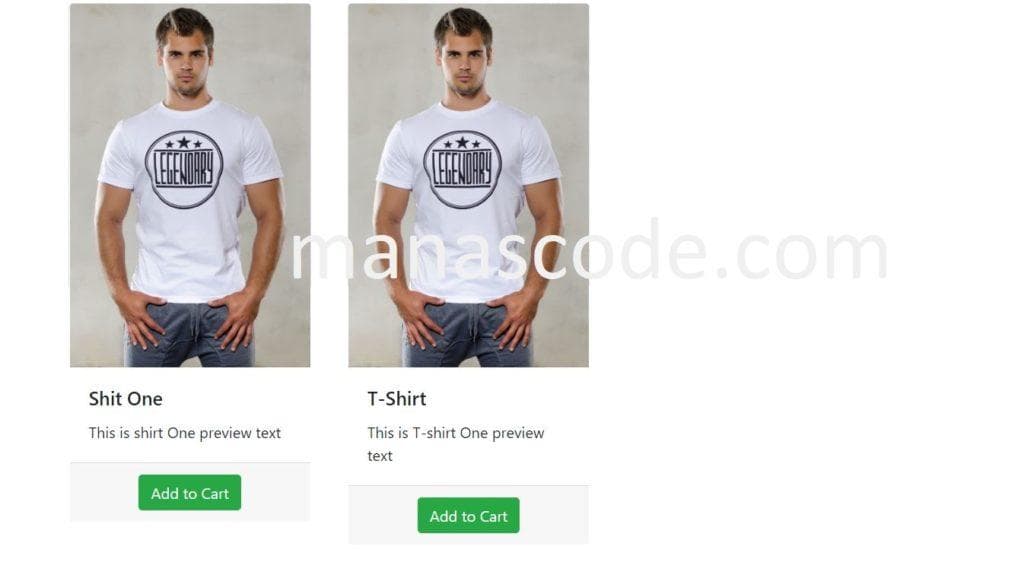
]+ static(settings.MEDIA_URL, document_root=settings.MEDIA_ROOT)After done all the steps correctly, now run the server of your django project and it will look something like this. For now we have only two products but in your case, you can have as much you want for testing.
8. Adding Products to Cart
Adding products to Cart is a primary function function for any ecommerce project or website. It’s so easy to do just like we did create a item for a model. It will be the same concept with some extra logic.
Now we need to create the Cart model but before that we need to have an app for the Cart. You can have the cart model inside the Products App but making a separate app will help you to reuse the Cart app for other projects as well. So again the same step to create a app and also don’t forget to install the app in the settings.py file.
After creating the Cart app, open the models.py and create a new python class to make the Cart Model.
Here is the Cart Model code :
from django.contrib.auth import get_user_model
from products.models import Product

# Get the user model
User = get_user_model()


# Cart Model
class Cart(models.Model):
    user = models.ForeignKey(User, on_delete=models.CASCADE)
    item = models.ForeignKey(Product, on_delete=models.CASCADE)
    quantity = models.IntegerField(default=1)
    created = models.DateTimeField(auto_now_add=True)


    def __str__(self):
        return f'{self.quantity} of {self.item.name}'
9. Create the order model
Now we need have the order model. So for this order model, we don’t need to create another app we can do that in the Cart app. So again in the models.py file create a new python class for creating the Order model.
Order Model :
# Order Model
class Order(models.Model):
    orderitems  = models.ManyToManyField(Cart)
    user = models.ForeignKey(User, on_delete=models.CASCADE)
    ordered = models.BooleanField(default=False)
    created = models.DateTimeField(auto_now_add=True)

    def __str__(self):
        return self.user.username
Same stuff, we have created a new models so, we have to migrate the models, now using <strong>py manage.py makemigration</strong> and py manage.py migrate.
10. Create the Add to Cart view
Adding item to the cart model from the home page, we need to create a new function for that so open the <strong>views.py</strong> file in the cart app and create a new function for the view.
Add Products to Cart View function code :
# Add to Cart View

def add_to_cart(request, slug):
    item = get_object_or_404(Product, slug=slug)
    order_item, created = Cart.objects.get_or_create(
        item=item,
        user=request.user
    )
    order_qs = Order.objects.filter(user=request.user, ordered=False)
    if order_qs.exists():
        order = order_qs[0]
        # check if the order item is in the order
        if order.orderitems.filter(item__slug=item.slug).exists():
            order_item.quantity += 1
            order_item.save()
            messages.info(request, "This item quantity was updated.")
            return redirect("mainapp:home")
        else:
            order.orderitems.add(order_item)
            messages.info(request, "This item was added to your cart.")
            return redirect("mainapp:home")
    else:
        order = Order.objects.create(
            user=request.user)
        order.orderitems.add(order_item)
        messages.info(request, "This item was added to your cart.")
        return redirect("mainapp:home")
In the Add to Cart View function, first we need the product id or slug to add the product so, We are just passing the slug as a parameter of the function . Then we are filtering the product using get_object_or_404 method ( Don’t forget to import the method on the top ) and storing the product in a variable called item.
After that we are creating a cart object by using the get_or_create. This method returns a tuple. If we are going to use Cart.objects.create() method then every time a user click add to cart it will create duplicate object every time.
So to avoid that we need to use get_or_create method to check if the user has the same product in his cart, then it will not going to create a new cart object with the same product again, it will going to just increase the quantity of the product.
11. Next step is remove the product from cart
Our next step will be remove the product quantity from the Cart. Again the same logic. Now removing the item from the Cart instead of adding.
Remove Cart Code :
# Remove item from cart

def remove_from_cart(request, slug):
    item = get_object_or_404(Product, slug=slug)
    cart_qs = Cart.objects.filter(user=request.user, item=item)
    if cart_qs.exists():
        cart = cart_qs[0]
        # Checking the cart quantity
        if cart.quantity > 1:
            cart.quantity -= 1
            cart.save()
        else:
            cart_qs.delete()
    order_qs = Order.objects.filter(
        user=request.user,
        ordered=False
    )
    if order_qs.exists():
        order = order_qs[0]
        # check if the order item is in the order
        if order.orderitems.filter(item__slug=item.slug).exists():
            order_item = Cart.objects.filter(
                item=item,
                user=request.user,
            )[0]
            order.orderitems.remove(order_item)
            messages.info(request, "This item was removed from your cart.")
            return redirect("mainapp:home")
        else:
            messages.info(request, "This item was not in your cart")
            return redirect("mainapp:home")
    else:
        messages.info(request, "You do not have an active order")
        return redirect("core:home")
12. Add the Add to Cart and Remove from Cart URL
Now go to the <strong>urls.py</strong> file in products app, you can even create a new file in the cart app but make it simple we are going to add the cart url in the Products app.
Add to Cart & Remove from Cart :
from django.urls import path
from . views import Home
from cart.views import Home, add_to_cart, remove_from_cart
app_name= 'mainapp'

urlpatterns = [
    path('', Home.as_view(), name='home'),
    path('cart/<slug>', add_to_cart, name='cart'),
    path('remove/<slug>', remove_from_cart, name='remove-cart'),
]
Now go the home.html again and add the link to add to cart and remove cart button to call the functions that we have created.
<a href="cart/{{ product.slug }}" class="btn btn-success">Add to Cart</a>
<a href="remove/{{ product.slug }}" class="btn btn-danger">Remove from Cart</a>
For now we are writing the url directly but in next tutorial we are going to use
get_absolute_urlmethod.
After all that save all the files and run the server and click on the Add to Cart button on the home page. Then it will redirect you to the home page again. If something went wrong then check the error and try to solve the problem or comment down below.
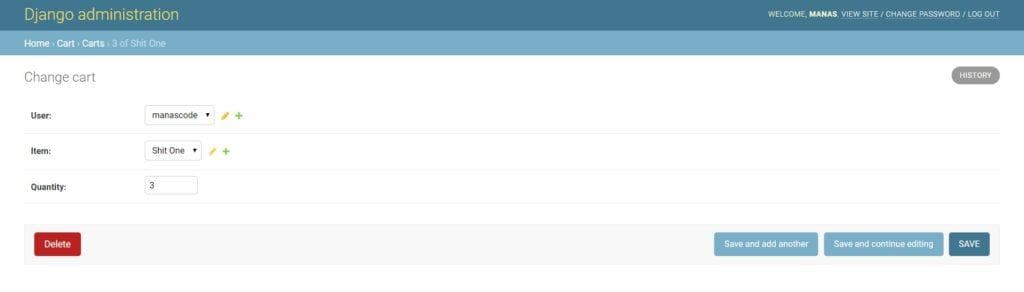
Now go to the admin dashboard to check the product added to the Cart to the corresponding user or not. If everything goes perfect the you should see something like this.
13. Next step will be
Our next step will be showing the cart items on the cart page and other steps like using a good lloking ecomerce html template and placing the order and all the other things.
Our final product will be look like this https://www.free-css.com/free-css-templates/page203/e-shopper. You can download the template and make the template ready for the next tutorial if you are advanced.
We are also learning Django, so in the full post if anything we missed out please let us know in the comment section. Thank You for reading all the posts.